Monday, December 19, 2022

How to customize Workflow Notifications in Oracle Fusion Cloud

Wondering how to customize an existing approval workflow notification to add a new field ?
Let's see how it can be achieved in Oracle ERP Cloud.

Let’s say we want to add GL Account Description to the GL Journal Approval Workflow Notification.

Normally, most of the workflow notification are based on BI Publisher model. So let's see which one is the seeded model for GL Journal Approval.

- Navigate to BI Publisher Catalog in your environment

- In the Folders pane, expand the Shared Folders -> Financials -> Workflow Notifications -> General Ledger -> Journals folder

- Locate ' Journal Approval Report


- Click More and select Customize option


- This will automatically create a custom copy of this report under Shared Folders -> Custom -> Financials -> Workflow Notifications -> General Ledger -> Journals folder


- Now, lets modify this report to add our new customizations so that they will reflect in the email notifications.

- Open the report and click on Edit button


- This will download the template file (RTF)


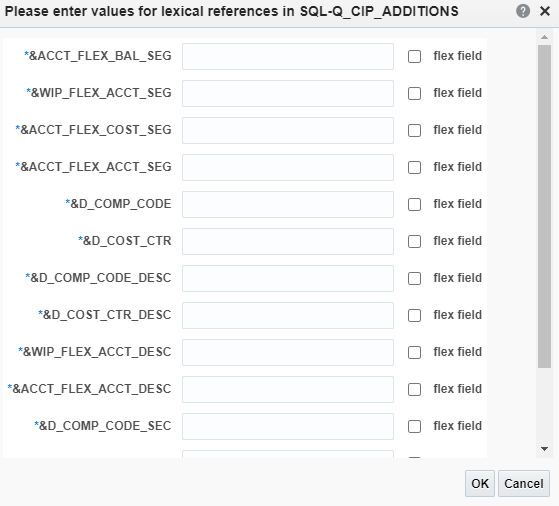
- Open the template file. It should look like this -


- Modify the template and add the new column COMBINATION_DESCRIPTION under CLINE_ACCOUNT column


- This field should pertain to COMBINATION_DESCRIPTION column which is already available in the seeded data model


- Save the template and upload to the custom version of Journal Approval Report. You would need to delete the existing template and upload a new one with the same name as original 'Journal Approval Email Notification' by using the modified RTF file.

- Once you click Upload, the Journal Approval Report page will return to the thumbnail view of the report layout templates.

- You can review/verify the newly uploaded template details by clicking the View a list link. Save Report to finalize the changes.

- Once these steps are done, the new customization is in place and should automatically take effect.

NOTE -
Configurable workflow notifications are refreshed every 24 hours so that they perform better for your users. But when you're making changes to reports, sub-templates, or data models, you can apply your changes sooner so they're available for testing. Create profile options to control when notifications reflect your changes after you upload them to the BI catalog. When you're done configuring notifications, use the same profile options to turn the refresh back to every 24 hours, to optimize performance. But even if you don't, the refresh automatically resets to 24 hours when it's been more than eight hours since you set the profile options.

If you don't wish to wait for 24 hours :
You can Create Profile Options to Control the Refresh
Your profile options can apply to all workflow tasks, a product family, or a product. Based on the scope you want, your profile option must have a profile option code that follows a certain format.


- Once the customization is in place, it should reflect in the subsequent workflow notifications. We can see the account description is shown in the Journal Approval notification with this change -


Share:

Friday, November 25, 2022

How to create a Value Set in Oracle Fusion Cloud

 Let's see how to create a Value Set in Oracle Fusion/ERP Cloud.

- Go to Setup and Maintenance -


- Set the desired business area e.g. Financials -


- Search for task Manage%Value%Set% and locate it as below -


- Open the task 

- Click on + sign to create a new Value Set -


- Enter all the necessary details for Value Set definition -


- Click on Manage Values to maintain Independent Value Set values

- Click on + sign to create new values -


- Click on + sign to create new values -


Share:

Wednesday, October 5, 2022

Lexical Parameters in Seeded BIP Reports in Oracle Fusion Cloud

So you want to customize a seeded report, say add a new column, but when you try to edit the query, it shows a pop-up asking you to enter values for Lexical References for all lexical parameters in the seeded query.

Now as we don't know the values for these lexical references and we cannot eliminate these from seeded query otherwise the report will stop working, we are not able to proceed with our custom changes.
It usually looks something like this:


So what's the solution to this problem ?

Here's the solution -

Oracle recommends to perform the data model customization in the following manner:

- Navigate to xmlpserver and download the data model in the custom folder as xdmz file

- Unzip this file and modify _datamodel.xdm using text editor


- One opened, locate your main query and make changes directly in the query


- In case you are adding a new column, make sure to create a new XML tag for this new columns. The new column won't appear in the Data Model (in front-end) without this step.


- Zip it back and rename it back to xdmz

- Upload xdmz back to the custom folder


- Now you'll see the modified query and the new column in the data model:


Note: The changes to the data model should be done gradually and by iterating the process until the desired effect is achieved.

Using this approach, you will avoid getting the pop-ups requesting values for lexical parameter when the customization is done through the front-end in traditional way.

Share:

Tuesday, October 4, 2022

How To Enable Custom DFFs in OTBI Subject Areas in Oracle Fusion Cloud

So, you have defined a bunch of DFFs but wondering why they don't appear in the corresponding subject areas when you build an OTBI Analysis ?

Well, let's see how you can enable them for BI analysis purposes and use in OTBI. 

Below are the steps to enable a DFF for BI / OTBI Analysis/Reporting

- Navigate to Setup and Maintenance


- Change Functional area to the desired one.e.g. Financials


- Search for something like Manage%<module>%Flexfields

e.g. Manage%Receivables%Flex%


- Open the Task

Enter the desired Flexfield Code (e.g. RA_CUSTOMER_TRX%)

Click Search


- Select the desired DFF and click Edit


- Select the Segment and click Edit


- Scroll all the way down and Enable the option ‘BI Enabled’


- Save and Close

Now, navigate to Scheduled Processes

Schedule New Process – 

Import Oracle Fusion Data Extensions for Transactional Business Intelligence

Run it for desired functional area (e.g. Financial Reporting)


Let the program finish. (It may take some time to complete).


If Process completes in Warning -

As per Doc ID 1616574.1, even if the process ends in a Warning, the Flexfield import will complete therefore the functionality of the job is not adversely affected.


Once process is finished -

- Navigate to Catalog and open the desired subject area

- You should see the DFF fields are now available in the subject area –


Share:

Wednesday, September 28, 2022

How to solve Nonexistent table issue while extracting BICC VO Query in Oracle Fusion Cloud

In my previous post, I explained how to retrieve database query for BICC VO in Oracle Fusion Cloud

Sometimes this method won't work as not all VOs are designed the same way.

There's a chance that you'll get below error:

ERROR
-----------------------
. [nQSError: 27047] Nonexistent table


This is expected behavior as the old VO's are available in the RPD repository (metadata of the BI Server) and hence SELECT_PHYSICAL works fine.

The VO which used above is trying to access in this case is a BICC VO and these BICC PVO names end with the string (.ExtractPVO). These BICC VO's are not part of RPD and directly based on ADF. So SELECT_PHYSICAL doesn't work.


So to overcome this error, you need to use the syntax as below and you should get the results without any error:


select * from
EXTERNAL('ADF','"oracle.apps.fscm.model.analytics.applicationModule.FscmTopModelAM_FscmTopModelAMLocal"."Connection Pool"').'<VO Name>' as t
FETCH FIRST 100 ROWS ONLY

e.g.

select * from
EXTERNAL('ADF','"oracle.apps.fscm.model.analytics.applicationModule.FscmTopModelAM_FscmTopModelAMLocal"."Connection Pool"').'FscmTopModelAM.FinExtractAM.ArBiccExtractAM.ReceivableActivityExtractPVO' as t
FETCH FIRST 100 ROWS ONLY


Share: